In late 2008, in an effort to get myself playing more games, I decided to play all 52 scenarios from Scenarios For All Ages by
Charles S Grant and Stuart Asquith. More than that, I decided to play them in order, 1 a week, starting on Nov 5. I knew I wouldn't
manage to play every week so I set a deadline of Dec 31st 2009. With a little help from my friends, I made it with a day to spare.

In the end, I played 52 games in 60 weeks. 34 solo games, 15 face to face games, 3 Play-by-Email mini-campaigns
17 other gamers from 4 countries participated, (Canada 11, US 4, Ireland 1, Argentina 1)

11 'periods' were played - 20/25mm Ancients (3), Prince Valiant 40mm skirmish (9), 40mm 16thC (10),
40mm semi-flat War of Polish Sucession (1), 40mm AWI (2), 40mm Pirate
Skirmish (5), 40mm early 19thC fictional (17), 15mm ACW (1), 25mm Zulu War (1),
20mm WWII (1), 20mm 1960's fictional (2)

I posted a brief report on each game on my webpage. I am shutting down my website so I am re-posting
the reports here, starting at Game #52 so that they will eventually appear in order. The reports were written in a variety of voices and tenses (sometimes all mixed together!) and it was tempting to rewrite them but I have left them as they were originally written with only very minor corrections, particularly to things like links.

To avoid copyright issues and save myself work, I have not given the details of the scenarios. Having a copy of the book will help make sense of the reports. The book may currently be purchased from John Curry at http://www.wargaming.co/ as well as from booksellers like On Military Matters and Caliver.


Monday, October 17, 2011

5 Nov 2008 Scenario 1: Attack on a Prepared Position.

This game was played between myself and Gary McMahon using my 40mm 16thC English and Scots and Rough Wooing.
The English under the Earl of Bedford (aka Gary McMahon) arrayed themselves with archers and artillery spread across the centre of the ridge line and the billmen clumped behind the crest on the left of their line. (3 inf +1 lt inf + 1 arty translated into 2 Battles each of 4 bills, 4 bows and 1 gun ( 1 company of bows being replaced by a company of arquebusiers)

The Scots under the Earl of Lennox (aka me) marched on along the road. 6 inf, 2 lt inf, 1 cav and 1 arty being translated as follows: Lord Home's 4 companies of border horse leading followed by the Campbell with 6 companies of highlanders, then the Earl with 6 Scots pike and 2 arquebusier and finally the Rhinegrave with 8 Landsknecht pike and 2 arquebusiers and 2 light guns all in French pay.

Lord Home advanced on the hill but was twice driven back by bow and cannon fire, finally succeeding in working around the English left. The Highlanders then deployed and stormed the hill. Lightly armoured, they fell in heaps under the arrow storm but enough of the chieftain's household remained to sweep away the archers and over run the guns before collecting their wounded (and spoils) and returning to camp. At this point, the Earl of Bedford led his sturdy billmen over the ridge. Lennox deployed his pikemen to face them while his arquebusiers skirmished forward. Evening was drawing nigh (Turn 9 of 12) and the English had high hopes of holding till dark but outnumbered 2 to 1 with their archers scattered, the English foot faded away into the shadow of the woods.

12 Nov 2008 Scenario 2 Threat to the Flank

This game was played between Gary McMahon's 25mm Imperial Romans and my 25mm Persians masquerading as Sassinids using Warhammer Ancient Battles.

An Imperial Roman force under Garius Maximus defends a river crossing in Asia Minor. The main force will be composed of 1,000 pts plus a free general & army standard with an 800 pt detachment. The attackers will be 'early' Sassinid Persians under Rossaphernes cobbled together from existing figures and judicious use of the Persian list from the 2nd ed of WAB. so no Cataphracts for now and my Clibinari will have thrusting spear instead of kontos. A general and army standard with 1,600 pts in the main force and 800 pts in the flanking force. Keeping to proportions of cavalry and infantry in the scenario won't be easy with Sassinids but luckily the latest research indicates that the Sassinids had regular infantry in addition to levies. As it turned out the Romans deployed 2 cohorts of infantry and 1 of archers and an alae of cavalry at the ford and sent a 3rd cohort plus archers and a double alae of cavalry to block the bridge, The Persian flanking force was 1 unit of Clibinari, 1 of allied horse archers, a unit on mountaineer (using the marine stats) and a unit of levy archers. The main force was a large unit of spearmen and another of archers, a large unit of mercenary light infantry,2 units of skirmishers, an elephant and a unit of cavalry with bow and spear.

Things got off to a good start for the Persians. The first volley of arrows routed the Roman archers at the ford exposing the legionaries. The Roman cavalry trotted forward and were wiped out by one close range volley from the clibinari and horse archers combined. One cohort charged forward and swept away a unit of slingers but that brought them into close range of the massed archers and it was a small remnant that fell back in good order onto the hill. Over the bridge the Persian cavalry charged and broke the Roman cavalry taking the archers with them. By end of turn 4 it looked in the bag.

The horse archers completed crossing the river and surrounded the remnants of the cohort that had marched to the bridge while the mercenaries broke into skirmish order and along with the heavy cavalry crossed the river into the gap left by the Roman cavalry. The spearmen and elephants moved forward as well. Suddenly the Roman cohort demonstrated the advantage of well trained troops, turned and charge the horse archers, with no where to flee to they unleashed their weakest volley of the game and were broken, every unit of skirmishers within range panicked and ran as well.

The clibinari charged the flank of the victorious legionaries but they must have been dismayed, 6 charging spears only managed to down 1 Roman and the 8 remaining legionnaires stood. The Persian lights rallied but dusk was falling and their spearmen were barely 1/2 way across the river. Barely 30 Romans remained in 3 battered cohorts backed by a few archers but remain they did and the Persians had failed to breakthrough before dark.

In retrospect, I had failed to keep track of time and waited too long before launching my spearmen and elephant forward to exploit the effects of the archery. The early success seem to have lulled me into believing that my cavalry and light infantry could do it all themselves and even there I had left it till the last possible turn and gotten careless with my horse archers as well. Gary seized the moment and his counter attack secured the ford till dark.

5 Dec 2008 Scenario 3 Disciplined vs Irregulars

This game was played solo using my 40mm 16thC English and Scots armies and Rough Wooing.
I decided to pit the firepower of veteran English longbows against Scottish levies using 2 stands per unit.
The English consisted of: a General with his bodyguard of Pensioners, a Captain of lancers with 2 lancers and a border horse, a Captain of bills with 3 armoured bills, 4 bows and a light gun, a Captain of light infantry with 2 bows and a company of arquebusiers and a spare card to level out the deck and allow them to pass once per turn if though advantageous.

The Scots had a General and 5 companies of pike with 2 shot, a Captain of lancers with 1 lancer, 2 border horse and 2 mounted arquebusiers (well the scenario said the irregulars had 1 mounted unit with missile weapons and that's what I had), a Captain and 5 companies of Border horse and a captain with 9 companies of highland swordsmen.

Things went badly wrong for the English in turn one and went down hill from there, dice, cards, everything seemed against them while the Scots could do no wrong. Even the parties of light horse sent on a wide flanking movement passed every control check. The Scots cavalry overran the English horse then the general, the Highlanders took on and broke the billmen, while the flanking horse rode over several archers and into the limbered gun. It took barely an hour to reduce the English army to a few scattered remnants.

In case it was a rules problem (or, perish the thought, prejudice) I replayed the game using the same broad plans. This time the Scots stalled when out of command control and the English archers plied their bows with effect. A clash of cavalry destroyed both parties leaving the way open for the Scots pike to charge head on into the Bills. In a flurry of dice, the General and 1/2 the pikemen went down. The English archers stepped up and supported by the artillery cut down the Highlanders in swathes then turned their bows on the border horse driving them off. The way was clear to march on with serious but acceptable losses.

10 Dec 2008 Scenario 4 Encirclement or Breakout

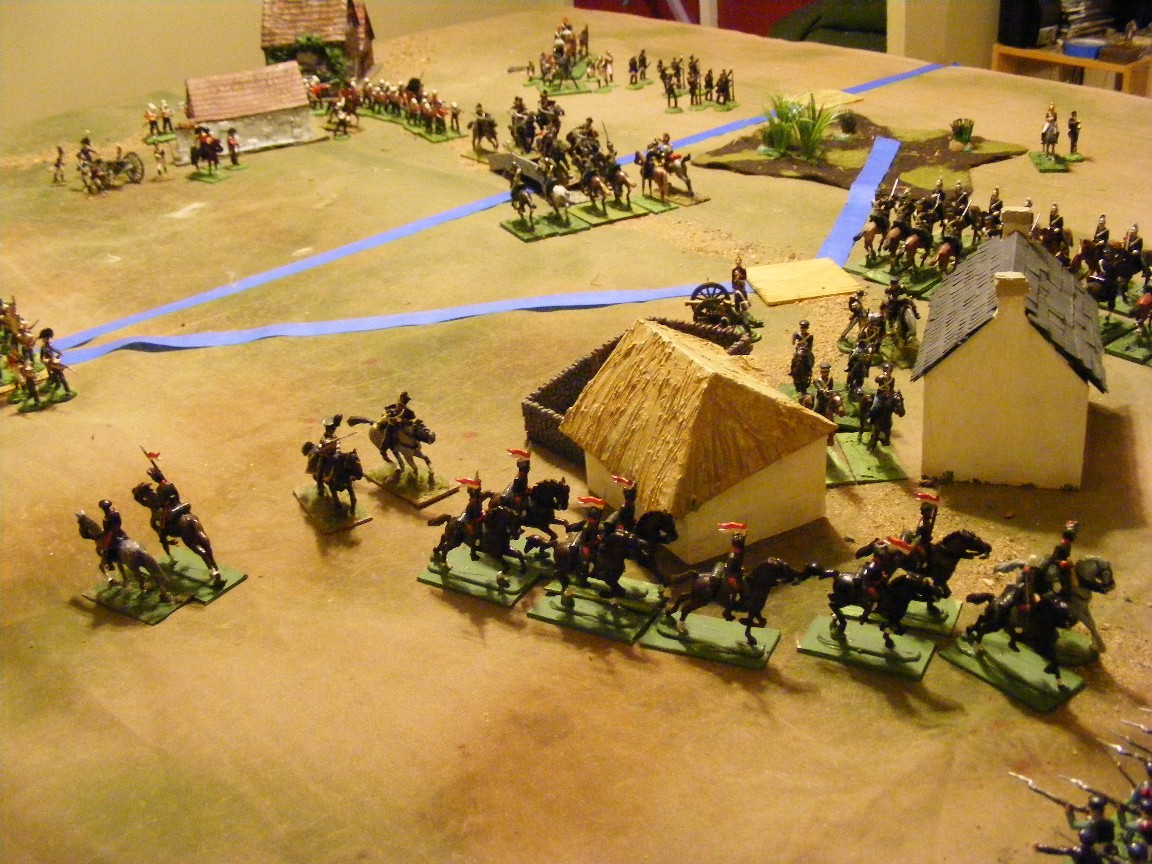
This game was played solo using my 40mm 16thC armies and Rough Wooing 

I decided to stay with the 16th C, pitting English vs French on the continent to test the revised rules. Each scenario unit was replaced by 4 companies of infantry or cavalry or 1 gun. The English were in the middle with 4 Battles, after dicing for deployment of battles their army began as: In advance: 4 Border Horse, on the right: 4 Bills & 4 Bows, on the left: 4 Bills, 4 Bows & 1 light gun, in the middle: 4 Demi-Lancers inc the General. In similar fashion I formed the French army then dice for the placement within each force. Force 1: Left: 6 Levy Pike & 2 shot. Right 4 Light Lancers, Force 2: In advance & to the right: 4 Gensdarme inc General, 2 mounted arquebusier, 2 reiter, behind and to the left: 4 pike, 1 crossbow, 2 shot, 1 swordsmen, 1 light gun. Force 3: 6 pike, 6 shot, 1 heavy gun. Forces 2 & 3 were beyond "detached" and had to take a control check each turn, all 3 Captains rolled "Bold". I was going to roll for battle plans but the point of escape seemed so obvious for the English that I just went for it and rushed the French up as quickly as possible.

The game began with the English light cavalry quickly moving to face the French light lancers, the left hand infantry backed them up, the demi-lancers faced the French main body while the right hand infantry began a slow retreat facing the enemy. On the 2nd turn the light cavalry clashed shaking both bodies but driving the English back.

Arrows drove off the remnants of the French lights leaving the way open for a clash of Bills vs Pikes. Despite the depth impetus, the pikes were driven back but then dug their heels in and the melee continued for several turns. The French Gensdarmes crashed into the English cavalry but got the worst and were driven off. Turn after turn, the main body of French Landsknechts stalled but finally they got in motion, deploying the artillery on a hill and pushing some skirmishers forward. A brisk skirmish action across the entire front went on as the English slowly backed up, archers evading the occasional charge, the reiters did follow through onto the bills but were repulsed. Once a company of bills from the Right Battle moved across and outflanked the French Pikes, they finally broke and ran leaving the way open for the English to retreat off table.

The English lost 7 companies out of 25 so technically it was a draw but given the bloody nature of the rules I can't picture how they could have gotten away with much less so have awarded them a marginal victory.

17 - 19 Dec 2008 Scenario 5: Fighting in an Urban Area.

This game was played solo using 19thC fictional armies using Hearts of Tin rules.


Since there is a Victorian look to most of the buildings I have, the mid-19thC seemed appropriate so it's off to the town of Wye on the edge of the Origawn Territory. The Red Queen's forces consisted of 2 brigades, one with 2 battalions of regular infantry, a battalion of riflemen and a field gun, the other with a battalion of incorporated militia, a battalion of volunteers raised largely from sailors, and a field gun. The scenario allows for 3 mines, one on a bridge, I meant to dice for their location but despite fielding an Engineer Officer, I forgot about the mines in the heat of battle!

The Blue forces consisted of 3 brigades, on their left, 2 regular battalions, a battalion of light infantry and a light gun, on the right, 2 battalions, a battalion of riflemen and a heavy gun and in reserve 2 battalions of regular infantry, the blue guard and a heavy howitzer. There was also a brigade of cavalry which stayed off table, there being no room for a cavalry charge on the narrow, barricaded streets of Wye.

The game began with a brisk push up either bank of the river which resulted in various detachments of riflemen and sailors being evicted from the houses on the north shore after a short fight. Blue deployed their artillery to fire across the river then proceeded to throw column after column over the bridges. For a while it looked like the task was impossible but then the Blue Guards were brought forward and crashing into the militia, sent them reeling. In short order the guards had cleared the western quarter.

On the eastern side, a prolonged barrage backed by sharpshooting from the riflemen finally weakened the red infantry enough to allow Brigadier Scott to lead a successful charge over the East bridge while the tattered remains of the sailor's battery at Central Bridge were simultaneously over run. Red's forces fell back and regrouped by the church as a messy street fight developed. Casualties had been high but Red refused to give in and eventually Blue's units started streaming back in disorder, refusing to rally and renew their charges and even the remains of the Blue Guard were wavering when Scott was struck down trying to lead the remnants of the 4th Infantry in one last charge. It was too much and General Ross reluctantly ordered a retreat.

31 Dec 2008 Scenario 6: Rearguard

This game was played solo using 19thC Fictional armies and Hearts of Tin rules.

I thought the next game would have to wait for the new year but I suddenly found 3 free hours on New Year's Eve afternoon. Blue's rearguard set up with 1 battalion split between garrisoning the town and formed in support in behind, 1 battalion on the hill to the west, the light infantry on the hill to the east, the artillery in front and the cavalry in reserve. Red began with the Lancers and Bodyguard on table.

They worked their way around the western hill and soon the Bodyguard and Tigers clashed yet again. In a flurry of charge and counter charge, the Tigers were driven from the table (again! I'm not sure if they have ever survived a battle) but the bodyguard was reduced to a rump which dismounted as a garrison for the farm by the exit point. The Lancers took up a position behind the town and watched. Both sides watched the north and waited, and waited.

Finally on turn 6 the first Red infantry arrived followed on turn 8 by the main body. The 1st Brigade advanced over the hill with Blue's 3rd Infantry retreating slowly before them. The 2nd Brigade drove straight forward into the town while their skirmishers worked their way east of it sparring with Blue's skirmishers. I was perhaps a little tired but with Red's infantry, outnumbering Blue 2 to 1, with the Lancers behind Blue and the farm by the exit which had been Blue's planned fallback position manned by Red's dismounted cavalry, I could think of no clever plan so Blue's infantry and artillery stood and fought. By turn 17 all that was left were the skirmishers clinging to the Eastern farm. Red's 3rd Brigade and cavalry had by passed Blue and exited followed by one of the 1st Brigade battalions on Turn 18 sealing the victory.

14 Jan 2008 Scenario 7: Hot Pursuit

This game was played solo using 40mm fictional armies and Hearts of Tin rules.

This scenario seemed perfect for the 16thC Scottish Border Country so I played it out using Rough Wooing but it was on the small side and over in under an hour with Scots escaping with nearly enough troops to count as a victory. So, I decided to reset and play again 1st with MacDuff in the War of 1812, lack of cavalry seriously hindered the British and the US forces marched off with barely a casualty. A sharp clash where the 2nd NY Dragoons routed some Canadian volunteer cavalry early on being decisive.

So I reset Red & Blue and played again using HofT and my glossy toy soldiers. This was the hardest fought game with Larsen's Lancers outflanking the Blue army, catching the 2nd infantry in march column, scattering them and capturing Brigadier Zinn (He can be seen being escorted off the field at left). A subsequent charge onto the 3rd Infantry was repulsed but they earned their pay. The 1st Dragoons repulsed a charge by the Queen's Hussars then fell back but the 2nd Dragoons were caught by the Director General's Bodyguard and cut to pieces. The FTC Rocket Horse Artillery battery was particularly effective, pounding Blue's artillery then catching a troop of dragoons bunched up in the narrow streets of Foamcorburg and dispersing them but the coup de grace came when the Green Tigers stormed up the road through the smoke of the rocket explosions, catching General Scott by surprise and taking him prisoner as well. Another victory for the Red Queen's forces. Has the tide turned?