In late 2008, in an effort to get myself playing more games, I decided to play all 52 scenarios from Scenarios For All Ages by
Charles S Grant and Stuart Asquith. More than that, I decided to play them in order, 1 a week, starting on Nov 5. I knew I wouldn't
manage to play every week so I set a deadline of Dec 31st 2009. With a little help from my friends, I made it with a day to spare.

In the end, I played 52 games in 60 weeks. 34 solo games, 15 face to face games, 3 Play-by-Email mini-campaigns
17 other gamers from 4 countries participated, (Canada 11, US 4, Ireland 1, Argentina 1)

11 'periods' were played - 20/25mm Ancients (3), Prince Valiant 40mm skirmish (9), 40mm 16thC (10),
40mm semi-flat War of Polish Sucession (1), 40mm AWI (2), 40mm Pirate
Skirmish (5), 40mm early 19thC fictional (17), 15mm ACW (1), 25mm Zulu War (1),
20mm WWII (1), 20mm 1960's fictional (2)

I posted a brief report on each game on my webpage. I am shutting down my website so I am re-posting
the reports here, starting at Game #52 so that they will eventually appear in order. The reports were written in a variety of voices and tenses (sometimes all mixed together!) and it was tempting to rewrite them but I have left them as they were originally written with only very minor corrections, particularly to things like links.

To avoid copyright issues and save myself work, I have not given the details of the scenarios. Having a copy of the book will help make sense of the reports. The book may currently be purchased from John Curry at http://www.wargaming.co/ as well as from booksellers like On Military Matters and Caliver.


Showing posts with label faraway. Show all posts

Monday, October 17, 2011

17 - 19 Dec 2008 Scenario 5: Fighting in an Urban Area.

This game was played solo using 19thC fictional armies using Hearts of Tin rules.


Since there is a Victorian look to most of the buildings I have, the mid-19thC seemed appropriate so it's off to the town of Wye on the edge of the Origawn Territory. The Red Queen's forces consisted of 2 brigades, one with 2 battalions of regular infantry, a battalion of riflemen and a field gun, the other with a battalion of incorporated militia, a battalion of volunteers raised largely from sailors, and a field gun. The scenario allows for 3 mines, one on a bridge, I meant to dice for their location but despite fielding an Engineer Officer, I forgot about the mines in the heat of battle!

The Blue forces consisted of 3 brigades, on their left, 2 regular battalions, a battalion of light infantry and a light gun, on the right, 2 battalions, a battalion of riflemen and a heavy gun and in reserve 2 battalions of regular infantry, the blue guard and a heavy howitzer. There was also a brigade of cavalry which stayed off table, there being no room for a cavalry charge on the narrow, barricaded streets of Wye.

The game began with a brisk push up either bank of the river which resulted in various detachments of riflemen and sailors being evicted from the houses on the north shore after a short fight. Blue deployed their artillery to fire across the river then proceeded to throw column after column over the bridges. For a while it looked like the task was impossible but then the Blue Guards were brought forward and crashing into the militia, sent them reeling. In short order the guards had cleared the western quarter.

On the eastern side, a prolonged barrage backed by sharpshooting from the riflemen finally weakened the red infantry enough to allow Brigadier Scott to lead a successful charge over the East bridge while the tattered remains of the sailor's battery at Central Bridge were simultaneously over run. Red's forces fell back and regrouped by the church as a messy street fight developed. Casualties had been high but Red refused to give in and eventually Blue's units started streaming back in disorder, refusing to rally and renew their charges and even the remains of the Blue Guard were wavering when Scott was struck down trying to lead the remnants of the 4th Infantry in one last charge. It was too much and General Ross reluctantly ordered a retreat.

31 Dec 2008 Scenario 6: Rearguard

This game was played solo using 19thC Fictional armies and Hearts of Tin rules.

I thought the next game would have to wait for the new year but I suddenly found 3 free hours on New Year's Eve afternoon. Blue's rearguard set up with 1 battalion split between garrisoning the town and formed in support in behind, 1 battalion on the hill to the west, the light infantry on the hill to the east, the artillery in front and the cavalry in reserve. Red began with the Lancers and Bodyguard on table.

They worked their way around the western hill and soon the Bodyguard and Tigers clashed yet again. In a flurry of charge and counter charge, the Tigers were driven from the table (again! I'm not sure if they have ever survived a battle) but the bodyguard was reduced to a rump which dismounted as a garrison for the farm by the exit point. The Lancers took up a position behind the town and watched. Both sides watched the north and waited, and waited.

Finally on turn 6 the first Red infantry arrived followed on turn 8 by the main body. The 1st Brigade advanced over the hill with Blue's 3rd Infantry retreating slowly before them. The 2nd Brigade drove straight forward into the town while their skirmishers worked their way east of it sparring with Blue's skirmishers. I was perhaps a little tired but with Red's infantry, outnumbering Blue 2 to 1, with the Lancers behind Blue and the farm by the exit which had been Blue's planned fallback position manned by Red's dismounted cavalry, I could think of no clever plan so Blue's infantry and artillery stood and fought. By turn 17 all that was left were the skirmishers clinging to the Eastern farm. Red's 3rd Brigade and cavalry had by passed Blue and exited followed by one of the 1st Brigade battalions on Turn 18 sealing the victory.

14 Jan 2008 Scenario 7: Hot Pursuit

This game was played solo using 40mm fictional armies and Hearts of Tin rules.

This scenario seemed perfect for the 16thC Scottish Border Country so I played it out using Rough Wooing but it was on the small side and over in under an hour with Scots escaping with nearly enough troops to count as a victory. So, I decided to reset and play again 1st with MacDuff in the War of 1812, lack of cavalry seriously hindered the British and the US forces marched off with barely a casualty. A sharp clash where the 2nd NY Dragoons routed some Canadian volunteer cavalry early on being decisive.

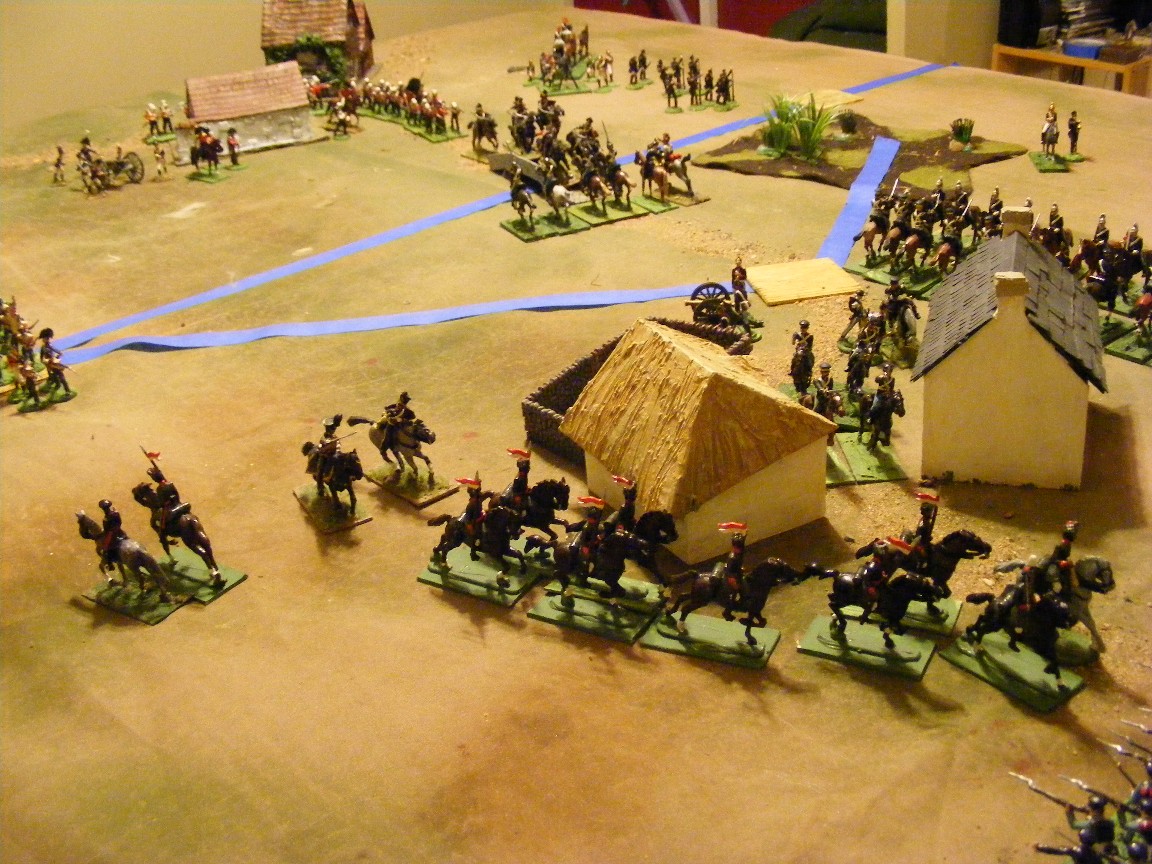
So I reset Red & Blue and played again using HofT and my glossy toy soldiers. This was the hardest fought game with Larsen's Lancers outflanking the Blue army, catching the 2nd infantry in march column, scattering them and capturing Brigadier Zinn (He can be seen being escorted off the field at left). A subsequent charge onto the 3rd Infantry was repulsed but they earned their pay. The 1st Dragoons repulsed a charge by the Queen's Hussars then fell back but the 2nd Dragoons were caught by the Director General's Bodyguard and cut to pieces. The FTC Rocket Horse Artillery battery was particularly effective, pounding Blue's artillery then catching a troop of dragoons bunched up in the narrow streets of Foamcorburg and dispersing them but the coup de grace came when the Green Tigers stormed up the road through the smoke of the rocket explosions, catching General Scott by surprise and taking him prisoner as well. Another victory for the Red Queen's forces. Has the tide turned?

21-22 Jan 2009 Scenario 8: A Vital Bridgehead.

This game was played solo using 40mm 19thC fictional armies and Hearts of Tin rules.

I wanted to play this on my 6'x8' table but life interfered so I squeezed it onto my temporary 5'x6' table.
The battle began well enough for Blue, the 1st infantry coolly forming square to repulse a cavalry attack then deploying into line unleashing some deadly volleys into the Buffs. As Red continued to build up their forces, they could make no headway, even their rockets doing more damage to friends than the enemy.

Behind the lines, the evacuation began smoothly and the engineers began work on a redoubt but as the new steam tractor puffed over the bridge, it hit a rut and threatened to roll over. Four turns passed before the bridge could be cleared. By this time the pressure was building on Blue's front line and it started to withdraw but too late! The rocket battery finally found the range just as the Queen's Rifles cleared the village and opened up on the 1st Infantry. As they staggered from the sudden heavy casualties the Bodyguard charged in and the line broke. Pursuing through, the Bodyguard crashed into the newly raised Frontier Horse but wielding their rifles from the saddle these fought them to a stand still. There was no room for these bold horsemen to retreat to so a swirling melee ended in their annihilation as a fighting unit. Covered by the Frontier Horse, the remnants of Blue's advance guard pulled back closely pursued by Red's infantry.

The engineers in town finished a fine redoubt then belatedly remembered their main purpose. As the light faded, the last wagons cleared the bridge followed by a handful of stragglers, a few light infantry, 1/2 a battery and a couple of battered companies of infantry as the remnants of the 3rd Infantry rallied in the streets and prepared to try and hold back one more charge to give them time to get away. Behind them, the engineers cleared the bridge and lit the fuse. A massive explosion threw up clouds of dust and shook the bridge but when it all settled, the bridge still stood.

18 Feb 2009 Scenario 11: River and Land

This game was played solo using 40mm 19thC fictional armies and Hearts of Tin rules.


This game was rather cramped on my smaller table and I accidentally made it worse by laying the river slightly off center on the wrong side so that there was little room for maneuver. I decided to play Red and diced for Blue's deployment which more or less decided their plan of attack. On reflection I would have done better to command Blue's attack.

I also started the gunboats off table and diced for their arrival. Blue's boats were fighting the current and rolling poorly to boot and were barely 1/2 way across the table when the gunboats arrived and opened fire on the schooner with deadly effect, sinking her in 3 turns. The longboats crammed with privateers had 2 choices, land behind their own lines or run the fire and try to board. On their first attempt, they were repelled by fire and 1 boat load fled the table. The remaining boat was fierce however and, helped by fire from batteries on shore which silenced the FTCS Reuse, driving her from the table, they boarded and took the FTCS Recycle. This success was short lived however and cannister and rockets from Red's artillery cut them down and they leapt back into their launch and fled downstream in their turn.

On the right bank, after a short sharp firefight in which the Victoria Rifles drove off the San Carlos Volunteers, the battle settled into an inconclusive long range duel of rifle, rocket and roundshot. On the left bank, Blue's infantry advanced in line and engaged in a prolonged exchange of musketry in which the 1st Infantry and Green Tigers mauled each other while the artillery dueled over head until Red's battered guns were forced to pull back. Eventually the young Buffs were also reduced to 1/2 strength and had to withdraw as Blue's reserves came forward. The game was basically a bloody draw but the price of the village was too high and General Sloidh ordered a withdrawal while his forces were still in fighting order. (Rolled a 2 on army morale.)

31 Mar 2009 Scenario 15: Forlorn Hope (1)

This game was played solo using 40mm 19thC armies and Hearts of Tin.

I'm still gathering forces and working on the background for my Red vs Blue campaign so technically haven't started yet but it seems to be developing a storyline all by itself. After the surprise appearance of Pirates as Blue allies in #11, an attack on a fortified city suggested a punitive expedition by Red, so instead of trenches and breaches its a surprise attack from the jungle at 1st light: the escalade of Freeport. The pirates had 1 unit spread out along the wall in detached companies with a heavy battery in the stone tower guarding the log boom blocking the river. A 2nd unit was asleep in town as well as the Grenadiers of San Carlos who had volunteered their services to defend the town. I counted the pirates as Veteran Militia. Apparently there are some religious issues as 2 armed Franciscans were serving as aides to Captain Mulrooney, the Pirate chief.

Red had 2 storming parties, one with 3 ladder parties, all grenadiers, and a company of rifles led by Brigadier Macfarlane, the other with 2 companies of grenadiers, a company of rifles and an Engineer with petard, all under the command of Brigadier Grey. The back up force under General Turner comprised the Rocket Troop, FTC Horse Artillery and 2 battalions of foot as well as the gunboat FTCS Recycle with a heavy mortar.

Grey's party managed to creep within 6" of the gate before the alarm was sounded but the laddermen, no doubt slowed by their burden, were not even 1/2 way from the edge of the jungle. As the alarm went up the rocket troop galloped forward and opened fire as the Recycle steamed into view. In short order, the surprisingly accurate rocket and mortar fire had silenced the Tower Battery (accurate if not counting a rogue rocket that just missed the Tigers!). Meanwhile Gray's grenadiers charged forward and engaged in a desperate close range firefight with the defenders while the Engineer struggled with his charges (tied melee) but at last the fuse was lit, the door blown open and the forlorn hope entered. Now where were the relief's?

There had been some confusion in the jungle and the Tigers were not even 1/2 way there so Grey sent 1 company to seize the rampart above the gate while the other held the door itself. Over on the wall, the 3 ladders went up but resistance was surprisingly fierce and 2 of the 3 parties were thrown back. The 3rd company was undaunted and clung to a narrow foothold.

The Buffs were quickly at hand and started feeding men up the ladders into the fight under a withering flanking fire. Macfarlane spotted an empty stretch of rampart and led the closest ladder party to it to effect a lodging, eventually reinforced by riflemen and some Buffs. Inside, fierce and bloody fighting reigned as the pirates and San Carlos Grenadiers struggled to evict the enemy but eventually, despite local, temporary victories, their casualties were too high and they fled back through the town, leaving it to its fate.

1 Apr 2009 Scenario 16 Forlorn Hope (2)

This game was played solo using 40mm 19thC armies and Hearts of Tin.

This game was a pretty straight forward set up with the Red Queen's forxces taking the role of Blue (?!) and vice versa. Both Forlorn Hopes managed to creep forward, through the abatis and rush the ramparts before being seen. The left hand redoubt was overrun and, the occupants evicted. They rallied and counter attacked but were driven off and dispersed. The right hand redoubt proved tougher and the sentries managed to hold until the canon crews and reserves could be turned out. A vicious close range fight ensued and despite being reinforced, the forlorn hope was wiped out and the attackers repulsed. This cleared the way for Red's artillery to open up. The first salvo of rockets was spectacular 3 ones! They burst in a wide pattern, one landing on the main Blue position indicating perhaps an error in targeting rather than an erratic rocket! The Queen's rifles closed in with a heavy fire as the artillery continued to pound the redoubt. Once the Buff's were rallied, they rushed the redoubt again and carried it against feeble resistance.

By this time Blue's main force was alerted and 2 battalions rushed to the rescue. Pounded by artillery and shot up by rifle fire, they momentarily faltered, then rallied and rushed the redoubts. The left hand redoubt held easily and the counter attackers broke and ran for cover but the Buffs did not fare well, with their Brigadier shot down they allowed themselves to be evicted yet again.

General Turner himself rode forward and ordered the Tigers to leave the left hand redoubt to a company of rifles and advance to capture the right hand redoubt again. Supported by rifle and artillery fire they stormed forward and drove out the last few remnants of Blue's force.

Sunday, October 16, 2011

5 May 2009 Scenario 22: Making the Best of a Bad Situation.

 This game was played solo using 40mm 19thC fictional armies and Hearts of Tin.

This is the 1st game played (solo) in my "new", renovations not quite finished, permanent wargames room.

A small division of the Red Queen's troops (3 battalions of line, 1 of light plus a battery of field artillery) are encamped beside the road through the Old Forest. A weary column of Blue troops is making its way down the road, Frontier Light Horse leading with a battalion of infantry, light infantry, guns and dragoons in a 2nd Brigade and 2 foot plus Blue Guards in the final brigade.

Red's artillery quickly brought their guns into action as Blue's lead brigade deployed, cavalry masking the advance of the 3rd infantry down the road. Under a heavy fire the light horse charged, it was nip and tuck but eventually the fencibles repulsed them and musketry and canister sent the remnants fleeing. The Victoria Rifles crested the hill backed by the Green Tigers while the Buffs headed into the woods to block the road. Blue had some problems getting his 2nd Brigade on line but eventually the 2nd Dragoons pushed the rifles off the hill and sat there for the rest of the game eyeing the Red square protecting the flank of the guns.

Blue's artillery finally made it forward and opened a heavy fire on the fencibles driving them back into the woods then turning on the Red guns. These refused to be drawn into counter battery and continued to lash out at Blue's infantry until battered into silence. On the right, a brisk counter attack by the Buffs drove off the 3rd infantry just as the Blue Guards came up. Supported by 2 line battalions, these drove the Buffs slowly back through the woods, both Brigadiers going down in the fight. The rifles fell back and joined the fight but eventually numbers told and General Turner was forced to order his remaining forces to retire leaving Blue the road through the forest.

20 May 2009. Scenario 23. Hostage Rescue (1) or '6 months in a Pirate Lair'.

This game was played solo using 40mm 19thC Fictional troops and Hearts of Tin


This scenario was obviously designed as a modern skirmish game. My first thought was to stay skirmish and switch it to Prince Valiant with a dragon ship substituting for the helicopters, but having HofT on the brain I thought perhaps a VSF balloon airship would do, but I haven't built any yet, so......steam boats on the river, the 19thC equivalent of helicopters.

It seems the pirates were upset by the capture of Freeport (see scenario 15) but not dispersed. The capture of Lord Dennis C Walts, an important officer of the Faraway Trading Company Fleet, and his Lady Veigh Enna, has led to a rescue mission led by Colonel Pointer of the Fencibles acting as Force Commander. The pirate garrison consisted of 4 companies of Spearmen, 6 of light infantry, and a light gun with 2 crew, all classed as Veteran Irregulars. Their starting position as well as that of the hostages was decided upon by shuffling and deploying cards which were not revealed until Red's forces were able to spot them. (In either words I treated all 4 potential hostage cards as real ones etc..)

The relief expedition which was carried on 2 unarmed river steamers, was composed of a company of Victoria Rifles, the grenadier companies of the Buffs and Green Tigers, a company of volunteers, a light rocket battery and a light gun, each with 2 crew. Once again the pirates proved to be both tough and lucky.

It is possible that the Red Queen's forces could have suffered a worse string of luck, but it wouldn't have been easy. On the right bank Colonel Pointer left the gun to batter the stone warehouse while he led the Grenadiers and Volunteers in a brave charge across the fields. Tripping over the muddy fields and evidently still seasick they did manage to drive many of the pirates back but cut down by cannister and gun fire and stoutly resisted in melee, they were surrounded and finally Colonel Pointer's twice wounded body was dragged off to join Lord Dennis in captivity.

On the left bank the Queen's troops did drive the enemy out of the first stone house and eventually inflicted serious casualties but suffered heavily themselves and barely a company's worth of troops ever re-embarked.
Stay tuned

26 May 2009. Scenario 24. Hostage Rescue (2) or 'Bad luck is better than none'

This game was played solo with 40mm 19thC Fictional armies using an adaptation of Medieval Mayhem.


Following the failed rescue event, (see previous game) the pirates moved their prime hostage inland to a sequestered vale containing 3 hamlets each with 2 buildings.


 The hostage was secretly assigned to one house by the simple expedient of dealing 6 cards face down with the Queen of Spades indicating the hostage position. Captain Deadeye and 11 pirates were assigned as guards, 2 to a house to confound the Queen’s men. Captain Blunt, of the Devil’s Own, volunteered to lead a rescue party and was given a sergeant and 4 riflemen of the Victoria Rifles. This elite group, equipped with shooting, melee and morale bonuses, split into 2, crept up through the woods and checked out 4 of the houses. No hostages but the 8 guards were alerted and in a running fight, 2 pirates were killed along with the bold Captain Blunt, the blundering Sergeant Piper and Rifleman Tweed while 2 other riflemen skedaddled (since this required a 6 followed by a 6, it was naturally no surprise). The lone remaining riflemen, eyeing 10 pirates converging on his hiding place in the woods, took a quick vote and decided to report home for further orders. A fund drive to collect a ransom for Lord Dennis and his wife is underway

26 May 2009. Scenario 25. Chance Encounter 1

This game was played solo using 40mm fictional armies and Hearts of Tin.

A foggy grey morning on the banks of the St Croix finds the advance guards of the opposing armies groping their way towards the bridge at Victoriaville to secure crossings for the upcoming campaign season. The Frontier Horse are obviously better scouts that Larsen’s Lancers and have found their way to the outskirts of town by the time the mist lifts to reveal the enemy just marching onto the field.

Seizing the initiative, General Ross ordered the Frontier Horse and 1st Dragoons to cross over and hold back the approaching enemy. The 1st foot was ordered to follow and seize Victoriaville. The 2nd infantry deployed to hold the center and support Battery B which unlimbered and opened fire on the dense red masses across the river. In the rear, the 3rd Infantry and Grey Volunteers were ordered to cross over the old bridge to seize Stone Farm.

Across the river, General Turner, finding himself humbugged, sent the Lancers and the Director General’s Bodyguards forward to see off the Blue cavalry and ordered the Buffs and Tigers to deploy, drive off the enemy infantry and seize the Old Bridge. He ordered the Victoria Rifles and FTC Horse Artillery Rocket Battery to drive off the enemy artillery and the Fencibles to support the cavalry.

At first everything seemed to be going Blue’s way, they seized both objectives on the 1st turn and the Frontier Horse not only repulsed the lancers but followed up, driving them back and pursuing into the Bodyguard who are forced back as well. The day was not over though and the Bodyguard rallied in time to meet the Dragoons. After a fierce melee, the Bodyguard was forced to retire behind the Fencible's square but Blue’s cavalry brigade had also suffered 50% losses and had to pull back. In the center, the rockets found the range and a hail of rifle and rocket fire devastated Battery B. By the old bridge, while the 3rd infantry and the Tigers hammered each other with close range musket volleys, the Buffs came forward and smashed into the Volunteers driving them pell mell back across the bridge. Two thirds of Blue’s Brigades were now shaken and General Ross decided to pull back and regroup. (ie he failed his General Morale Test)

15 July 2009 Scenario 29: Raid on a Train.

This game was played solo using 40mm 19thC Fictional armies and Hearts of Tin.

A July afternoon in the Rahdon Hills, the Oberhilse Frontier Light Horse have been patrolling the new rail line that the Fahrway Trading Company has built from their mines in the disputed territory to the headwaters of the East Wye River, suddenly they see one of the new fangled steam engines sitting idle, guarded by a detachment of Faraway regulars, the Buffs. Flashing off a heliograph message to the 1st Dragoons requesting support, they deploy into line, send out skirmishers and descend towards the train. The long roll sounds from the camp as the red coated soldiers grab their muskets and fall in.

A few shots ring out as the frontiersmen fire their long rifles from the saddle while the main body aligns them selves as if for a charge. A terse command rings out and the Buffs smoothly form square. The frontiersmen are brave fighters but charging squares is not their idea of warfare, they trot closer and pull out their rifles. In the square, Colonel Pointer watches the slow drain of casualties with concern while scanning the western horizon for some sign of the rescue train that he is expecting. At last he decides that the horsemen do not mean to close. He orders the Buffs into line and advances expecting the horsemen to fall back. Surprisingly, they stand as if pinned, all but the skirmishers who pull back behind a patch of woods, he orders a devasting volley and the horsemen finally ride back out of range.

 Suddenly from behind, there is a commotion, the light horse skirmishers have ridden around the woods and are about to swarm onboard the empty train. Another crisp order sends the light company doubling back towards the train while the main body falls back slowly in line. A cheer goes up, there coming around the bend is a train bristling with the bayonets of the Green Tigers. Time has run out, the light horse dash forward firing from the saddle but another sharp volley sends them to the right about. Two hours later, the Blue Dragoons wend their way through the hills and scrub woods but they are too late, the enemy is gone.

20 Sep 2009 Scenario 35: Surprise 2

This game was played solo using 40mm 19thC fictional armies and Hearts of Tin.


I rather thought the timeframes and movement rates might be a problem with my rules but I was tired and ..... anyway I decided to push on as written. The Oberhilse force consisted of the 1st Dragoons, Paipur Tigers, Frontier Light Horse, 1st Infantry and a handful of skirmishers. Each bridge was held by a company of the Green Tigers while the rest of the tigers, fencibles and Buffs supported by Lancers and a battery of foot artillery held the town.
The skirmishers had crept into the wood by the eastern bridge and opened a heavy fire on the bridge guard while the 1st Infantry rushed across the table in column. The cavalry followed behind them, keeping a wary eye on the town but by the time the gun was manned and turned about and the garrison turned out, the bridge had been over run. A few stray shots followed as the raiders rode off having lost a single company of light cavalry to enemy fire

4 Oct 2009 Scenario 36: Night Attack-1

This game was played solo using 1/72nd 19thC fictional armies using Hearts of Tin. 

In order to get more games going, I decided to bring back some smaller figures and a few scraps of terrain and set up another small (4x5)  gaming table at the kennel. One of my old 15mm armies seemed like the obvious choice but I've just started work on some 20mm plastic RCW and have been casting a nostalgic eye on some Airfix ACW figs I painted up 25 years ago  during an earlier nostalgic bout, soooooo ...... 

It is 1863 and civil war is raging in Oberhilse. A brigade of Republican troops in their blue uniforms are camped by the Blubagh Run. Six companies plus a squadron of dragoons are on guard at the Western crossing in case a threatened Rebel night attack materializes, 4 more companies plus a field gun are in camp while 3 more squadrons are en route. The Rebels are indeed on the march but they are aiming at the Eastern ford, 2 squadrons of light horse, 16 companies of infantry divided into 2 brigades and a field gun. This would have been a good game for a GM,  map moves and written orders or at least a programmed enemy but the night rules and control test  caused lots of mayhem as it was.

The Rebel 1st Brigade managed to cross easily but the 2nd Brigade went haring off to the west on its own initiative. The 1st fight of the game came as a single squadron of dragoons dashed itself against the rebels as they deployed from the crossing and was cut down to a man. (oops) Behind them the blue infantry formed line with the 3rd Infantry in reserve. Across the run, the Rebel 2nd Brigade deployed to cross the run behind the blue line. The 3rd Infantry was ordered up and advanced into melee range leading to a fierce musketry duel across the run. 

Feeling the onus to attack, the Rebel commander ordered the 1st Brigade forward and the blue force was caught in a nasty 2 way fight but with the advantage of 1st fire and the gun, threw back the 1st Brigade. The regiment of rebels on the far side, backed off voluntarily after being shaken by losses. After a brief pause, the rebel lines came forward again just as the remaining dragoons spurred forward to attack the 2nd Brigade. (not sure why...)  The rebel unit composed of volunteers from the northern mountains, fired high, broke and were ridden down but enough dragoons were hit to shake the cavalry brigade. As the rebel infantry renewed their attack, the rebel light horse flanked the blue line and the 2nd Infantry broke and scattered and the whole blue line fell back in considerable disorder. The rebels were just as badly battered however (all brigades on both sides were now shaken) and also had to fall back.

5 Oct 2009 Scenario 37: Night Attack - 2

This game was played solo using 40mm 19thC Fictional armies and Hearts of Tin rules.


After Blue's successful raid (see scenario 35) a full scale invasion was launched. General Turner was tasked with holding them at Long Ridge. Near dawn on the 5th of October, alert sentries reported the sound of moving troops and the army was turned out. The Buffs occupied Sutherton with the Tigers and 'A' Battery on their right. The York Volunteers occupied Norville with the Fencibles to their left and the 41st Foot in reserve. As the morning mist lifted the enemy could be seen approaching, dragoons and the Oberhilse field force to the south east, volunteers and regulars to the south west.

Realizing the futility of opposing a division with a single regiment of lancers, Larsen's Horse were called back and the brigade concentrated behind the center while the 41st foot and Fencibles were hastened to form a defensive line to the east of Sutherton.

Across the field, General Ross regarded the mess of woods and villages in front of the Dragoon brigade and ordered them to the opposite flank. General Tabor, in command, was a capable officer but never one to hurry and the battle was well joined before he completed the move. General Zinn, however, had the bit between his teeth and without giving the artillery time to fire more than a token shot, rushed his brigade forward. A series of fierce fire fights resulted in the Red infantry being slowly forced back over the course of the day, all the way to Norville.

In the center, the Oberhilse regulars rushed forward to attack Sutherton, supported by volunteer artillery and the Frontier Horse. Between the rapid and accurate fire of 'A' battery and the steady Red infantry, the supporting forces were shaken and thrown back to be followed by the bluecoats despite their initial success in seizing the outskirts of town. This was not without a cost however, and the remains of the 1st Brigade were unable to hold back the Volunteer brigade when it renewed the attack. By now the Dragoons had come up and they swept up the hill to be met by the lancers. After a bloody but indecisive melee, the remaining lancers fell back as the supporting Bodyguard charged in, shattering the dragoon brigade and driving them back. Before they could capitalize on their success though, the advancing volunteers unleashed a devastating volley into their flank and General Turner was forced to order a retreat

Thursday, October 6, 2011

Scenario 44 - 9 Nov - 23Dec Reconnaissance Operation PBEM Mini-campaign

This mini-campaign was played by email by 2 friends with Faraway (Red) vs Oberhilse (Blue) (Those referring to the book will see that I have, as often, reversed the roles of red & blue to match the armies being used.. Since no major battles took place, I've decided to display a copy of the map that was used. Red's copy was missing a few minor features. Not every movement is shown on the map and these are broad stroke interpretations but its probably too busy as is. The stars indicate significant clashes, the arrows indicate general movement. The broad bars indicate positions where troops halted for a substantial period, in many cases, where they ended the mini-campaign.


General Legge advanced on a wide front. General Porter's cavalry clashed fairly far forward and actually rode down some over bold light infantry in the north but soon he had been driven back onto the towns of Tuey (2e) & Phivee (5e). In the north Red managed to slip a light cavalry unit past Blue's outposts. It is part of the fun of GM'ing such an affair that I could compare orders and see the LC being sent precisely in the one direction where they could not avoid contacting an advancing Blue brigade as pursuing Blue cavalry came up behind them. I rolled some dice to see if they perceived the trap in time and then rolled some more for the results in case they could slip away with minor harm but alas only a few stragglers reported back and that several days later, meantime they just disappeared leaving Gen Legge to ponder their fate. He seems to have pondered accurately and Larsen's Lancers unit were ordered farther north. They clashed  with the Frontier Light Horse but disengaged and Porter's cavalry turned West to chase off the King's Hussars, not North or East, leaving the lancers to reach the river and recce south along it, back through Tuaiche (2h) and then south west to RV with  reinforcements. Meanwhile there was a feeble attempt to storm Tuey which was forestalled by Blue reinforcements and both sides settled down to watch each other. In the south the Blue Dragoons clashed 3 times with enemy cavalry but failed to stop 2 regiments of light cavalry from slipping away to the south and along to the river where they rode north and joined with Larsen's. The DG Bodyguard, after their own clash with the dragoons, rode north around the lake and through a hole in Blue's lines, they met up with the light cavalry and escorted them back. South of the lake both sides also sat and glared at each other,   neither side strong enough to attack. Sudden;y, at the last minute General Porter realized what was happening and ordered a rapid attempt to cut off the enemy cavalry and destroy them. 12 hours too late, the San Carlos Volunteers were in time to snipe at the DG Bodyguard and the Dragoons chased a few rearguard patrols but the rest of the rece forces retired.


So what had they found out? They had travelled  almost every road and found all of the ones not marked on their map and they scouted the river and all 3 bridges, they also had a very good idea of the forces and location of Blue in the forward area but had not been in enough strength to force the main bridge guards to show their hand so Gen Legge knows how to get to the river but only identified about 1/2 of the defending force.

Wednesday, September 14, 2011

Game 45 Major River Crossing

Scenario 45  15 Nov - Dec 16  A Major River Crossing PBEM Mini-Campaign Joe (Oberhilse) vs Les (Farway) with me as GM and playing out the tabletop encounters solo. Table top rules "With MacDuff To The Frontier" (version3)

The campaign began with Oberhilse's General Shandy ordering feints on the left and in the center, complete with pioneers and fake pontoon wagons. Gen Howie was interested but declined to make any rash moves, unless you included the dispatch of a commando like raid by volunteers from the Victoria Rifles who crossed  the river in 2 small commandeered rowboats to attempt to burn the work in progress, alas a throw or 2 of the dice led to them being spotted and ambushed by a patrol of Frontier Light Horse. Eventually the real bridge began on the right, behind an island. There was some difficulty preparing a road across the island which turned out to have a steep rocky west bank (dice again) and the bridge was delayed just long enough for 2 brigades of Faraway troops to arrive unseen and take up positions behind some high ground astride the enemy's path  inland. Oberhilse mustered 6 regiments of infantry, 2 batteries of artillery, 2 regiments of dragoons and 2 regiments of light cavalry plus a battalion of pioneers who were busy with the bridge, their orders were to cross over and push on towards the town of Thriegy (3G). Faraway mustered 3 regiments of infantry, 2 of light infantry, 2 batteries of artillery, 2 cavalry regiments and 1/2 unit of light cavalry. Their orders were to ambush the enemy if possible.


A screen of Yellow Hussars pushed out first to scout out the high ground ahead. The Royal Hussars easily drove them back but not before they had spotted enemy infantry where only cavalry had been seen until now. The Blue infantry deployed and an attack was launched up the right while the cavalry was massed on the left and sent to out flank the enemy. As the attack neared the hill, driving back some skirmishers, the hill was suddenly crowned with red coated infantry. Blue halted and opened a desultory long range fire while they waited for the results of the cavalry attack and for the artillery to come forward. A first charge drove back the Queen's cavalry all along the line but they rallied behind an infantry square. Stalemate until Blue's artillery rolled some spectacular counter battery dice and swept the hill clean.

Something had to be done so the Red infantry swept down the hill, won the initiative toss and unleashed a 1st volley at 25 paces and went in with the bayonet sending Blue's infantry reeling. Luckily for them the reserve held, helped by a shower of grape (cannister really). Stalemate again. As Blue's 2nd brigade and artillery moved forward to seize the center hill, Brigadier Kearney got impatient and launched his dragoons and light cavalry at the enemy, now outnumbered 2:1 these troops came through, routing the dragoons and driving back the light cavalry but destroying themselves in the process.


A fine army shattered and even bringing up unenaged units there were not enough Faraway troops for a counter attack. The bridgehead is established, to what end, another mini-campaign would be needed.


Tuesday, August 30, 2011

Game 46 Amphibious/Land Action


This game is a mini-camapign. It was played out by email between 17 Nov - 26 Dec 2009 with Cesar Alfredo Paz commanding the defending Oberhilse (Blue) forces and Conrad Kinch commanding the attacking Faraway (Red) forces. I played out encounters on the table top solo using their orders as a guide.  The game was set in my fictional land as part of the wars between Oberhilse and Faraway using Hearts of Tin as rules.


Gen Kinch chose to land all of his forces at the northernmost beach, starting with his cavalry and ordering all forces to make aggressive attacks relying on cold steel. This took me a bit by surprise and I had to play out the landing, scrambling to come up with rules for the cavalry to make a beach assault. I didn't have horse barges so assumed that the men were carried in barges while the horses swam. I rolled to see how long it would take for the men to saddle up and mount once on shore. The defenders were initially a single squadron of light cavalry soon reinforced by infantry, artillery and more cavalry. A fierce battle erupted with Blue eventually pulling back in the face of ever growing numbers but with Red having suffered dreadful losses, luckily made up for by some excellent hospital rolls!

       General Paz ordered a defense of the next pass and ordered all of his cavalry forward to support but also rushed troops to start a defensive line next to the old fort. His orders were to be cautious and not risk destruction so when Gen Kinch launched a late afternoon assault, (Moodkee came to mind). I rolled for Brigadier Zinn's reaction and he bailed at the 1st sight of Red's bayonets. Luckily a brigade of Dragoons was close to hand and covered the retreat. After the fight on the beach, Red had only 4 squadrons to face the 8 that Blue now had in hand.

    A day's march brought the armies face to face on the main defensive line, Red had a slight superiority in artillery and infantry but his gunboats could only reach the enemy's left flank and about 1/3 of the defenders had slight breastworks and all were on top of or behind the ridge. Gen Kinch, again taking a page from Gough, deployed his guns and infantry in a single line, ordered an intense bombardment to be followed by a bayonet charge. Only the cavalry was held back. Gen Paz deployed his field artillery and line infantry in the front, held his light artillery and massed light infantry behind the center and deployed his cavalry off to the right, also behind the hill, with orders to wait until the enemy was engaged then advance and hit his flank.

      The Red attack carried the old fort and nearly carried the left hand redoubt which would have laid Blue's flank open but it held and reinforcements were at hand. In the center an attack on the main redoubt was stalled by artillery despite heavy losses from Red's guns. Again reinforcements were to hand and once Blue's cavalry swept forward, things looked bleak. Red's cavalry came gallantly to meet them but were over powered and a final assault led by Kinch in person, broke against the reinforced redoubts. With Kearney's dragoons  loose behind Red's lines, and Red's infantry having taken over 50% losses, the campaign was over.

Game 51: Gunfight

This game was played solo on 28 Dec 2009 using homecast 40mm figures of my own design and a musket era adaptation of Medieval Mayhem. Not having any cowboys, I decided to keep to the Law & Order vs Bad Guys theme, in this case a patrol of the Queen's soldiers, sent to apprehend a nest of smugglers.


I randomly assigned the 6 smugglers around town and marched the patrol straight down the road. The patrol, showing extreme discipline, managed to roll a total of 4" on its 2 dice, 3 turns in a row!, giving the smugglers lots of time to scatter, take cover and open up.

The patrol got the first hit in though, shooting down a smuggler in the field. They then charged to the right and cleared the closest house with the bayonet, losing 1 man to musket fire on the way in. Regrouping, they rushed across the street under a hot fire and beat in the door. Leading the way, Lieutenant Pointer shot down the Smuggler Chief and the remaining smuggler threw down his musket and surrendered.